
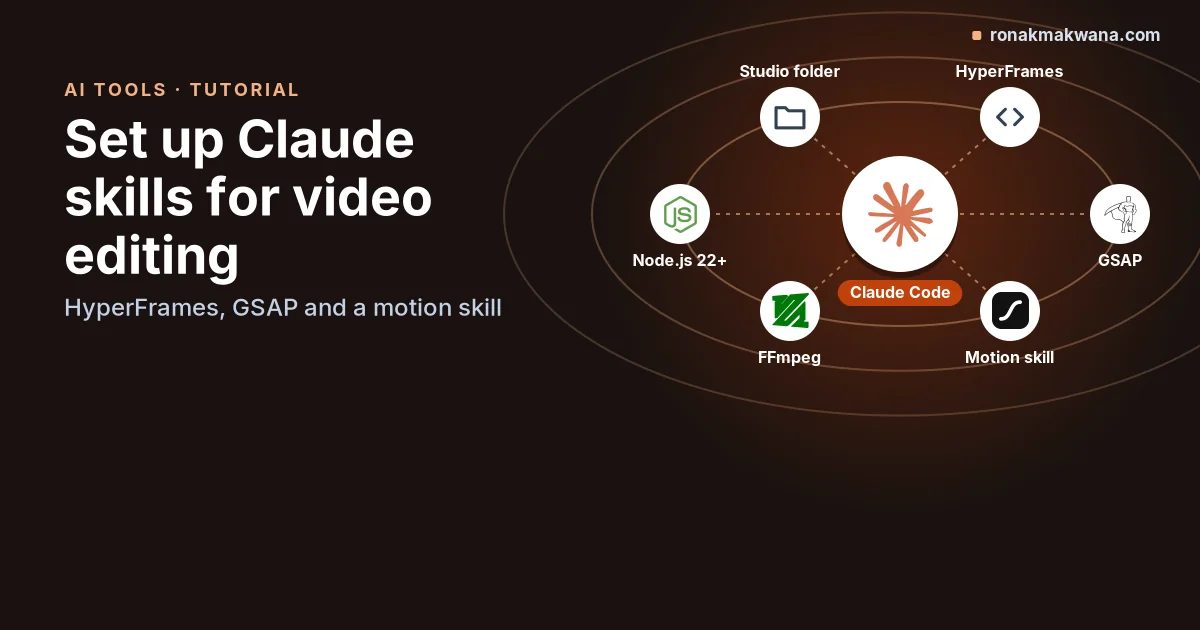
To set up Claude skills for video editing, install three things into Claude Code: the HyperFrames skills (HTML rendered to MP4), a motion design skill such as LottieFiles/motion-design-skill (timing and easing rules), and, if you prefer React, the official Remotion agent skills. Then give Claude a project folder with a CLAUDE.md that sets the rules, and approve its work at fixed checkpoints instead of accepting the first render.
This tutorial follows the starter setup in Keepy Labs’ Claude Master Guide, chapter 14: “Turn Claude Into a Video Studio”. The commands below come from each project’s own README or docs. I checked them against those sources on 4 November 2026 but did not run them, and every command is labelled that way.
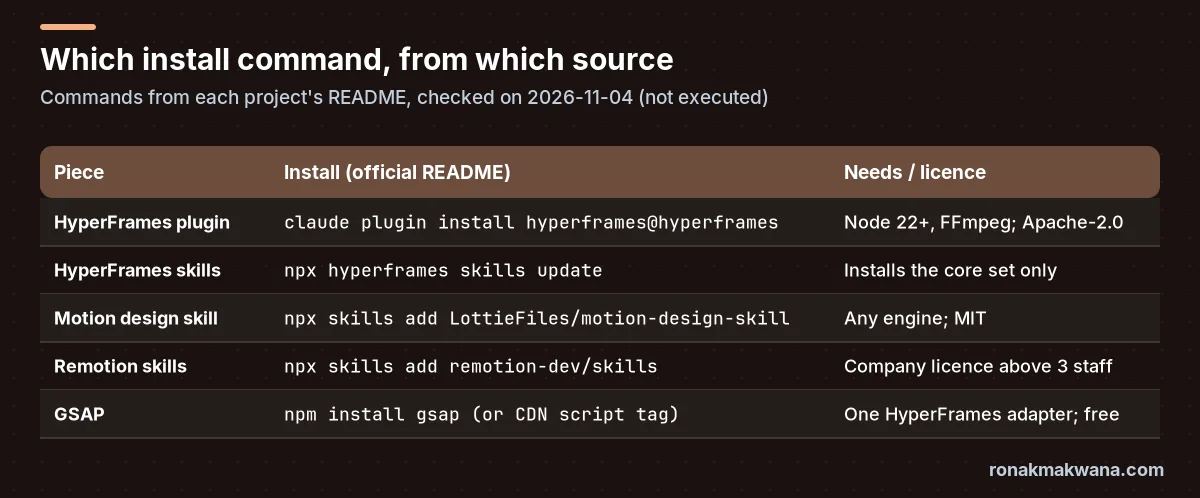
Quick answer: what to install
- HyperFrames (engine):
npx hyperframes skills updateinstalls the core skills as standalone skills (a Claude Code plugin is also available). Needs Node.js 22+ and FFmpeg (HyperFrames: Make videos with Claude Code). - Motion design skill (taste):
npx skills add LottieFiles/motion-design-skill. Engine-agnostic timing, easing and choreography rules (README). - GSAP (timelines): one of the animation adapters HyperFrames supports. HyperFrames’ README example loads it from a CDN script tag;
npm install gsapworks for a local copy (GSAP repo). - Optional, Remotion:
npx skills add remotion-dev/skills. Check the Remotion licence first: companies with more than three employees need a company licence.
Those first three are the ones the guide recommends for a first clip. It lists 24 repos in total and advises shipping one 10-second clip before installing more, which is sound advice.
What a Claude skill is, and where it lives
A skill is a folder with a SKILL.md file: YAML frontmatter (a name and a description that tells Claude when to use it) followed by instructions, optionally with scripts and reference files beside it. Claude loads a skill when it’s relevant, or you call it directly with /skill-name (Claude Code docs: Extend Claude with skills; Agent Skills overview).
Claude Code looks for skills in a few places. The two you’ll use here:
~/.claude/skills/<skill-name>/SKILL.md: personal, available in all your projects on that machine..claude/skills/<skill-name>/SKILL.md: project, available in that repository. Commit it so collaborators get it too.- Plugin skills, such as HyperFrames installed as a plugin, are called as
/plugin-name:skill-name, for example/hyperframes:hyperframes.
Run /skills inside Claude Code to see what loaded. Edits to SKILL.md files in those folders are picked up in the running session without a restart.
Prerequisites
- Claude Code, signed in. Usage bills to your Claude or Anthropic Console account.
- Node.js 22 or newer, with npm (HyperFrames README lists Node.js 22+).
- FFmpeg on your
PATH, for encoding MP4. - A folder to work in. Use a fresh one for your first video.
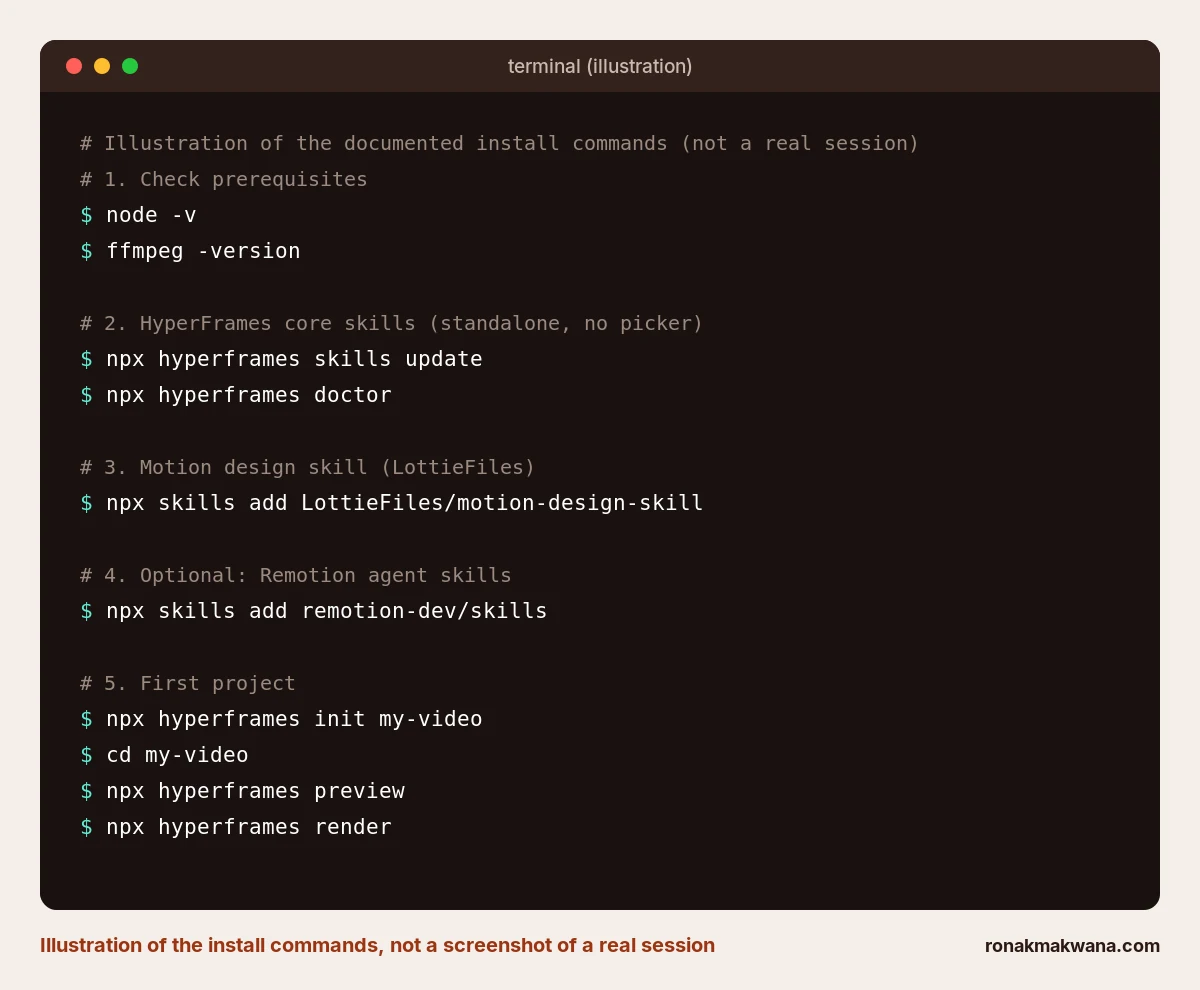
# Check versions before installing.
node -v        # needs v22 or newer
ffmpeg -version
claude --version
Step 1: Install HyperFrames for Claude Code
HyperFrames, from HeyGen, turns HTML, CSS and seekable animations into deterministic MP4 files and ships skills written for coding agents. Apache-2.0 licensed. The docs offer two routes: standalone skills, or a Claude Code plugin (source). I installed everything from the terminal as standalone skills, not the plugin, so that route comes first:
# From the HyperFrames docs. Option A: interactive picker. Choose "Core Skills".
npx skills add heygen-com/hyperframes

# Option B: installs exactly the core set, no picker.
npx hyperframes skills update

# Check the local toolchain (Node, FFmpeg):
npx hyperframes doctor
If you’d rather use the plugin, the docs give these commands:
# From the HyperFrames docs (plugin route; I didn't use it).
claude plugin marketplace add heygen-com/hyperframes
claude plugin install hyperframes@hyperframes

# Then start a new Claude Code session, or run /reload-plugins in the current one.
# Check the local toolchain (Node, FFmpeg):
The core set is /hyperframes (the render contract and work loop, read first), /hyperframes-cli, /hyperframes-registry (ready-made blocks such as captions, charts and transitions) and /media-use (music, voice-over, images, cutouts). The README warns that a non-interactive npx skills add without --skill installs all nine published skills, so use hyperframes skills update when an agent runs the install for you.
Step 2: Add a motion design skill, and optionally Remotion
An engine renders frames; it doesn’t know what good motion looks like. LottieFiles/motion-design-skill (MIT) fills that gap: an 8-step checklist, duration and easing tables, choreography and quality rules, written to work with CSS, GSAP, Lottie, Framer Motion or any other system.
# From the LottieFiles README.
npx skills add LottieFiles/motion-design-skill
If you work in React, Remotion maintains official agent skills, including /remotion-best-practices, /remotion-create, /remotion-render and /remotion-captions (Remotion docs: Agent Skills):
# From the remotion-dev/skills README.
npx skills add remotion-dev/skills
The guide says it uses HyperFrames and that Remotion also works. You don’t need both for a first clip. Choose one engine.
Step 3: Give Claude a studio folder
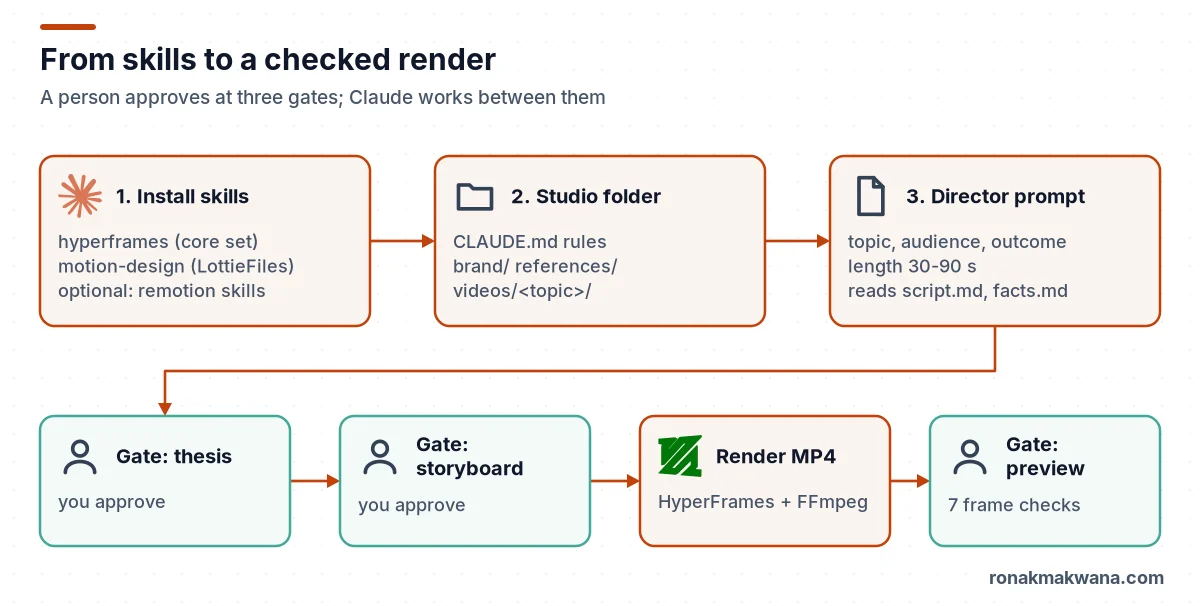
The guide’s central idea is that the rules live in files, not in a long chat. Claude Code reads CLAUDE.md at the start of every session, so the folder carries the process from video to video. This is the layout the guide proposes:
my-studio/
  CLAUDE.md          how this studio works: gates and rules
  brand/             logo, colours, fonts, example frames, music track
  references/        reels to match, each with a "why it works" note
  videos/
    2026-11-04-topic/
      script.md      the approved script, word for word
      facts.md       every number on screen, with its source
      plan.md        scenes, timings, which effect lands on which word
      renders/       previews and the final export
      checks.md      what the review found and what got fixed
A starter CLAUDE.md that encodes the guide’s gates. I wrote this from the guide’s description; it is an example and has not been executed:
# Studio rules (example, not executed)

## Gates: stop and wait for my approval
1. After the thesis: one sentence plus the facts it uses.
2. After the storyboard: scenes, timings, on-screen words.
3. After the first full render, before the final export.

## Rules
- Never put a number on screen unless it is in facts.md with a source.
- Use brand/ for colours, fonts and music. Do not invent a palette.
- One layout and one caption style per video; 3-6 effects on single words.
- Save the exact render command in plan.md.
- Before calling a video done, run the check-room skill and write results to checks.md.
- When a check catches a mistake, add a rule here so it doesn't happen twice.
Step 4: Make a 10-second test clip
Before any long prompt, prove the toolchain renders. Open Claude Code in an empty folder and use the test prompt from the HyperFrames Claude Code guide:
Using /hyperframes:hyperframes, make a 10-second product intro for https://example.com.Claude writes an HTML project, opens a live preview and renders an MP4. You can drive the same steps by hand with the CLI:
# From the HyperFrames README.
npx hyperframes init my-video
cd my-video
npx hyperframes preview   # browser preview with live reload
npx hyperframes render    # render to MP4
Once that works, the guide’s next step is its “director prompt”: a structured prompt that has Claude act as director, writer, motion designer and render engineer for one kind of video, a drawn explainer with no face on camera. It reads script.md and facts.md, stops for approval after the thesis, the storyboard and the first render, and won’t call the film finished until the render passes its checks. Keepy Labs publishes the prompt on the guide page behind a free unlock, so I haven’t reproduced it here. The guide also notes the prompt’s limits: most setups can’t compose music, so supply your own track, and a full run with checks takes an hour or two.
Step 5: Turn the review into a project skill
This is the step I’d add to the guide. Its “check room” is seven yes/no questions to ask of every frame. Saved as a project skill, Claude can run them on its own renders, and you can call them with /check-frames. Example skill, written for this post and not executed:
# .claude/skills/check-frames/SKILL.md  (example, not executed)
---
name: check-frames
description: Review a rendered video before it is called done. Use after any preview or final render in videos/, or when asked to check a video.
---

1. Extract a frame every 0.5 s from the render with FFmpeg, e.g.
   ffmpeg -i renders/preview.mp4 -vf fps=2 renders/frames/%04d.png
2. For each frame, answer yes or no:
   - Is a word broken across two lines or split at a hyphen?
   - Does text overlap other text or a card?
   - Does a caption or graphic cover the face?
   - Is a headline mostly hidden behind the person?
   - Is text clipped at the frame edge?
   - Is the person cut by a hard straight edge?
   - Is the graphic area empty while the voice is still talking?
3. Check that every number on screen appears in facts.md with a source.
4. Check that the last frame answers the first.
5. Write each failure to checks.md with the frame file name and a proposed fix.
   Do not mark the video done while any check fails.
The seven questions are the guide’s; the FFmpeg fps filter is a standard way to sample frames. The guide adds two passes no frame check can do: watch the video muted, then listen without the picture. Keep those for yourself.
Expected results
| After | You should see |
|---|---|
| Step 1 | /skills lists the HyperFrames skills; npx hyperframes doctor reports Node and FFmpeg |
| Step 2 | /skills also lists the motion design skill (and Remotion’s skills if you added them) |
| Step 4 | A project folder with HTML source, a live preview, and an MP4 from render |
| Step 5 | /check-frames available; a checks.md with findings after a render |
These are the documented outcomes. Steps 3 and 5 are examples written for this post and haven’t been run.
What I built with it: a 90-second Azure tips short
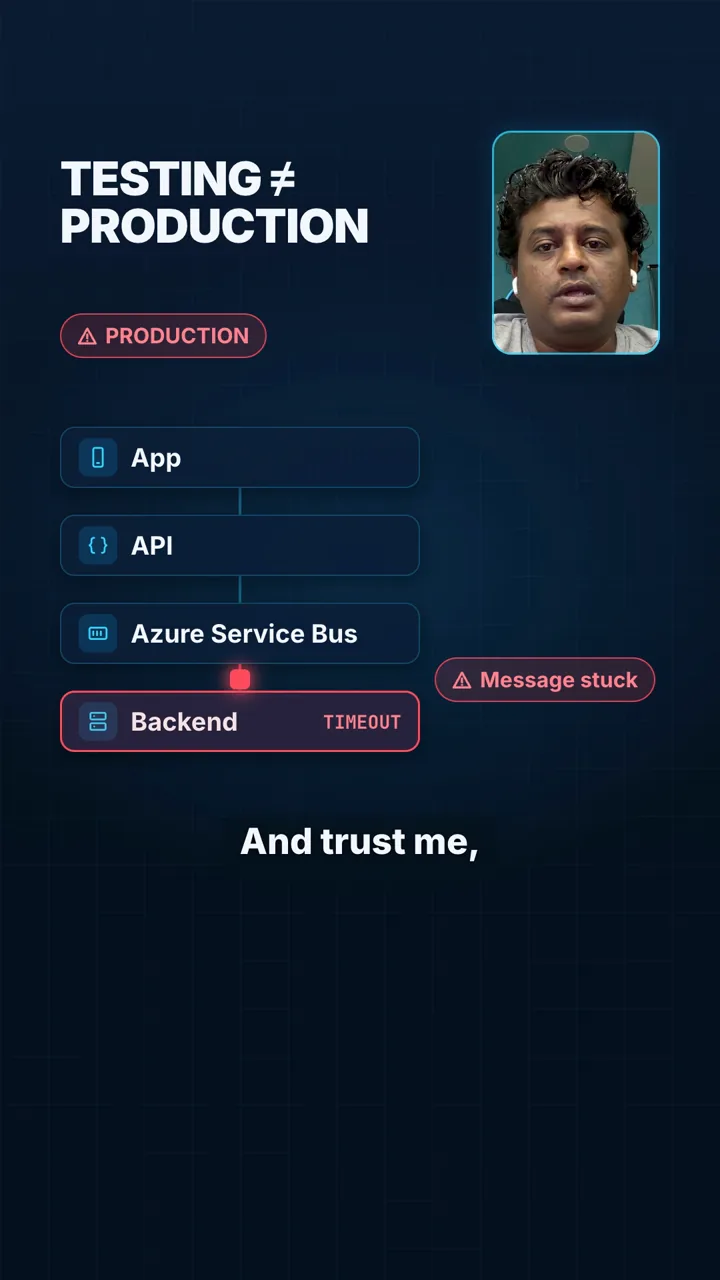
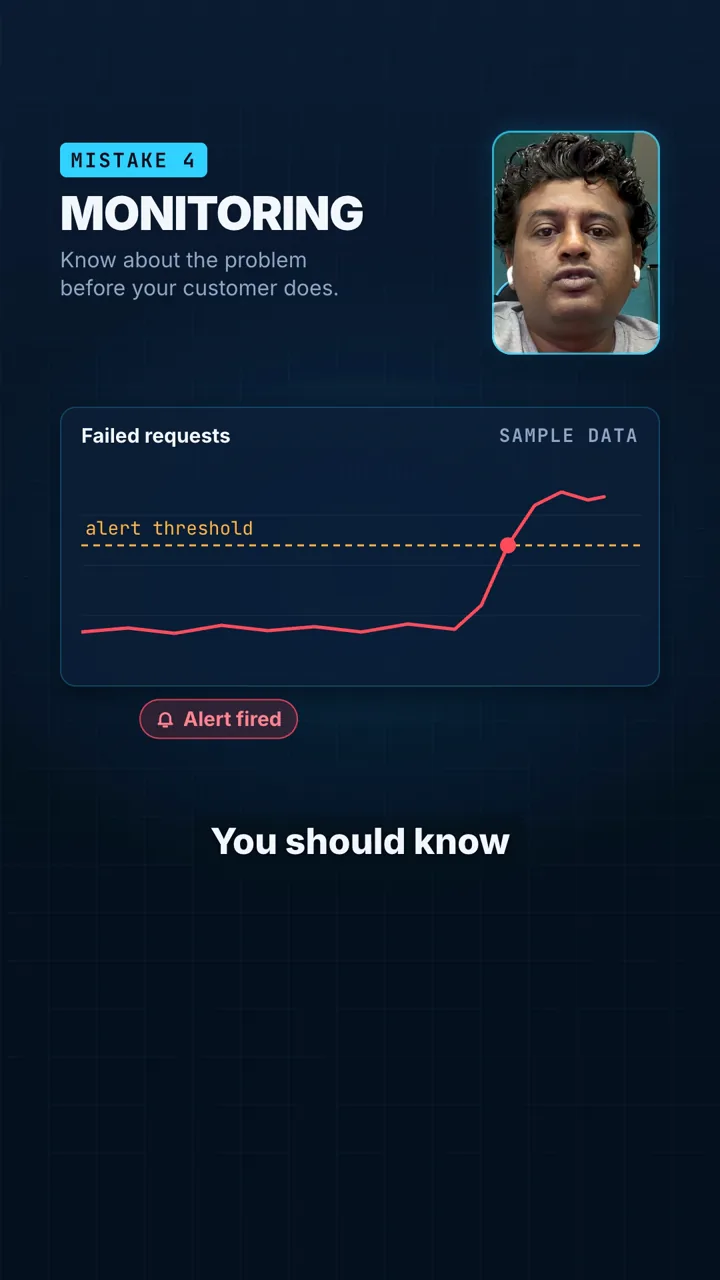
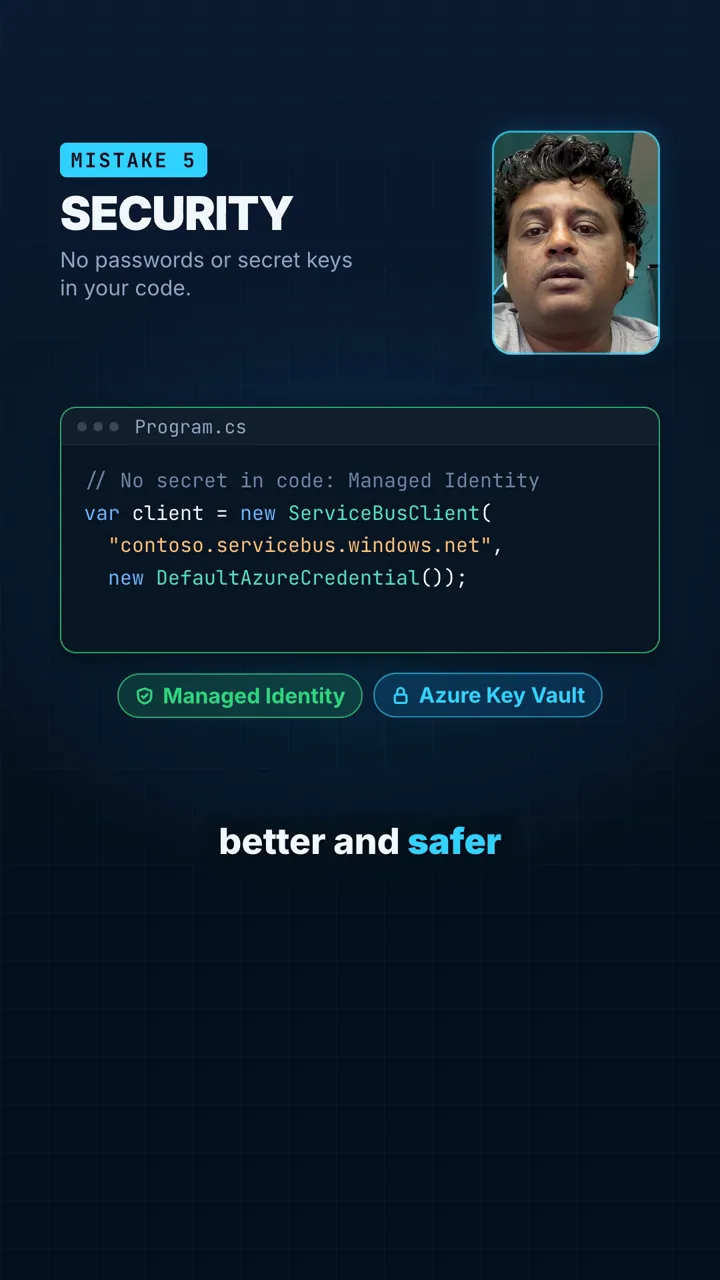
My first render with this setup is a 90-second vertical short on five Azure integration mistakes. It combines a talking-head camera in a picture-in-picture box, word-by-word captions and animated diagram cards on a dark blue background. The render worked well.
- Testing isn’t production: an App, API, Azure Service Bus and Backend stack, with a message stuck at a timed-out backend.
- Retries: a client calls an API, gets a 503, waits 2 seconds, and the retry returns 200.
- Duplicate messages: repeats are skipped by MessageId.
- Dead-letter queue: messages that keep failing are moved aside.
- Monitoring: a failed-requests chart crosses an alert threshold and fires an alert. The chart is labelled sample data.
- Security: a hard-coded SharedAccessKey is replaced with
ServiceBusClientandDefaultAzureCredential, with Managed Identity and Azure Key Vault tags.
Troubleshooting
Render fails or the doctor flags Node
HyperFrames needs Node.js 22 or newer. Check node -v; an older Node, for example 20, is below the documented minimum. Upgrade, then run npx hyperframes doctor again.
No MP4, or an FFmpeg error
FFmpeg must be installed and on your PATH. Run ffmpeg -version in the same terminal Claude Code uses. Install it from ffmpeg.org or your package manager.
Skills don’t appear
After a plugin install, start a new session or run /reload-plugins. Standalone skills installed into a project only load when Claude Code starts in that project (or below it). Run /skills to confirm. HyperFrames’ README also notes that npx skills add reads the skills.sh registry, which can lag the latest release by hours; npx hyperframes skills update installs the skills that match your CLI version.
Too many skills installed
A non-interactive npx skills add heygen-com/hyperframes without --skill installs all nine HyperFrames skills. Remove the extra skill folders, or reinstall with npx hyperframes skills update.
The video looks generic
The guide’s fix: show, don’t describe. Put a reference reel in references/ with three lines on why it works (pacing, layout, where the effects land), and keep the brand files in brand/.
Security, licences and cost
- Review third-party skills before installing. A skill is instructions, and sometimes scripts, that Claude follows with your permissions. Read the
SKILL.mdand any scripts first, especially from small repos. - Check licences. HyperFrames is Apache-2.0; the LottieFiles skill is MIT; GSAP is free under its standard licence; Remotion is free for individuals and companies of up to three employees, with a company licence above that (licence). The guide flags that one listed repo, OneTake, is PolyForm Noncommercial, so don’t use it for client work.
- Cost. HyperFrames itself is free. Your Claude plan pays for the agent, and the HyperFrames docs say HeyGen media such as avatars and generated clips use HeyGen credits only when you ask for them. Animation drawn in code has no per-second generation bill.
- Facts. Keep every on-screen number in
facts.mdwith a source. A polished count-up of a wrong figure does more damage than a plain slide.
What the guide covers, and what this post adds
The Keepy Labs guide covers a lot more than this tutorial: its client studio (script, make and check “rooms”), four video types (talking head, character ad, micro-drama, drawn animation), an edit layer for talking-head footage, the director prompt, a list of 24 open-source repos, common mistakes and a five-day plan. Some sections, including the edit-layer effect clips and the full prompt, are behind a free unlock on the page.
This post narrows that to one job, installing the skills and getting a first render, and adds three things: each install command traced to its project’s own docs, the version and licence requirements the guide doesn’t spell out (Node 22+, FFmpeg, Remotion’s company licence), and the check room packaged as a reusable Claude Code skill.
More tutorials are on the blog.
Sources
- Turn Claude Into a Video Studio: Claude Master Guide, chapter 14 (Keepy Labs)
- Extend Claude with skills (Claude Code docs)
- Agent Skills overview (Claude platform docs)
- heygen-com/hyperframes (GitHub README)
- Make videos with Claude Code (HyperFrames docs)
- LottieFiles/motion-design-skill (GitHub README)
- remotion-dev/skills (GitHub README)
- Agent Skills (Remotion docs)
- Remotion License (GitHub)
- greensock/GSAP (GitHub)
- GSAP Standard License
- FFmpeg filters: fps